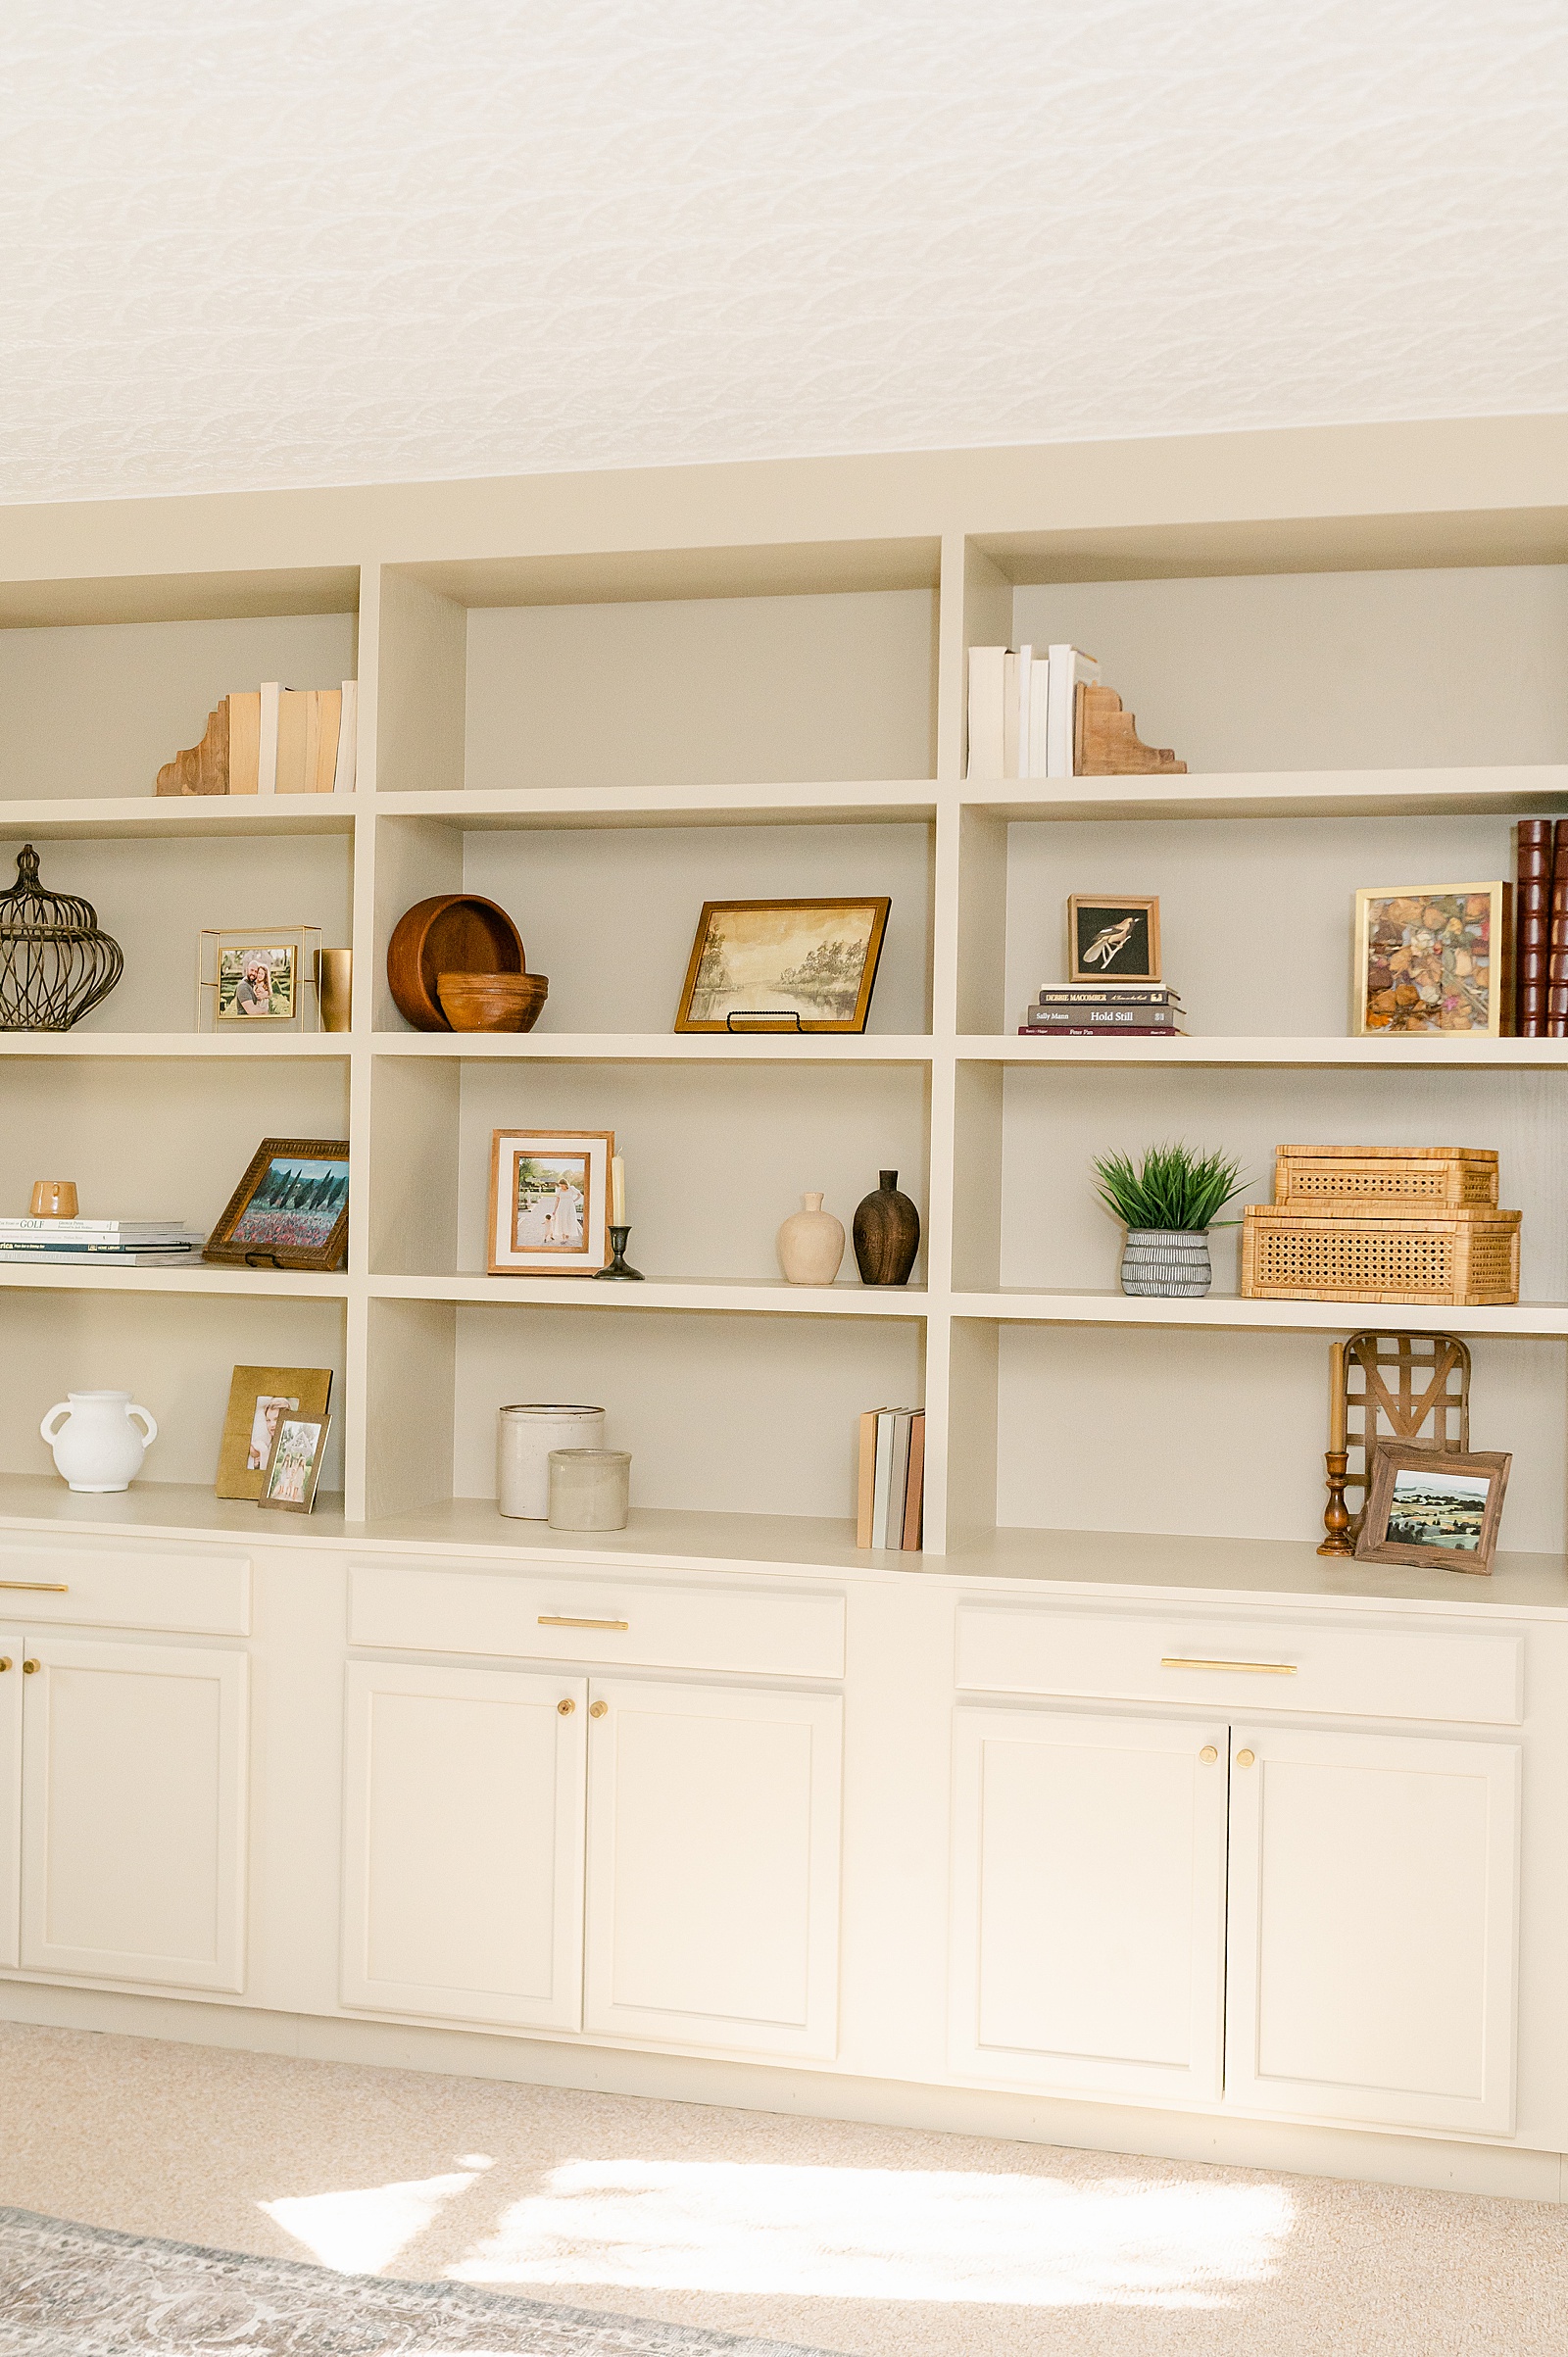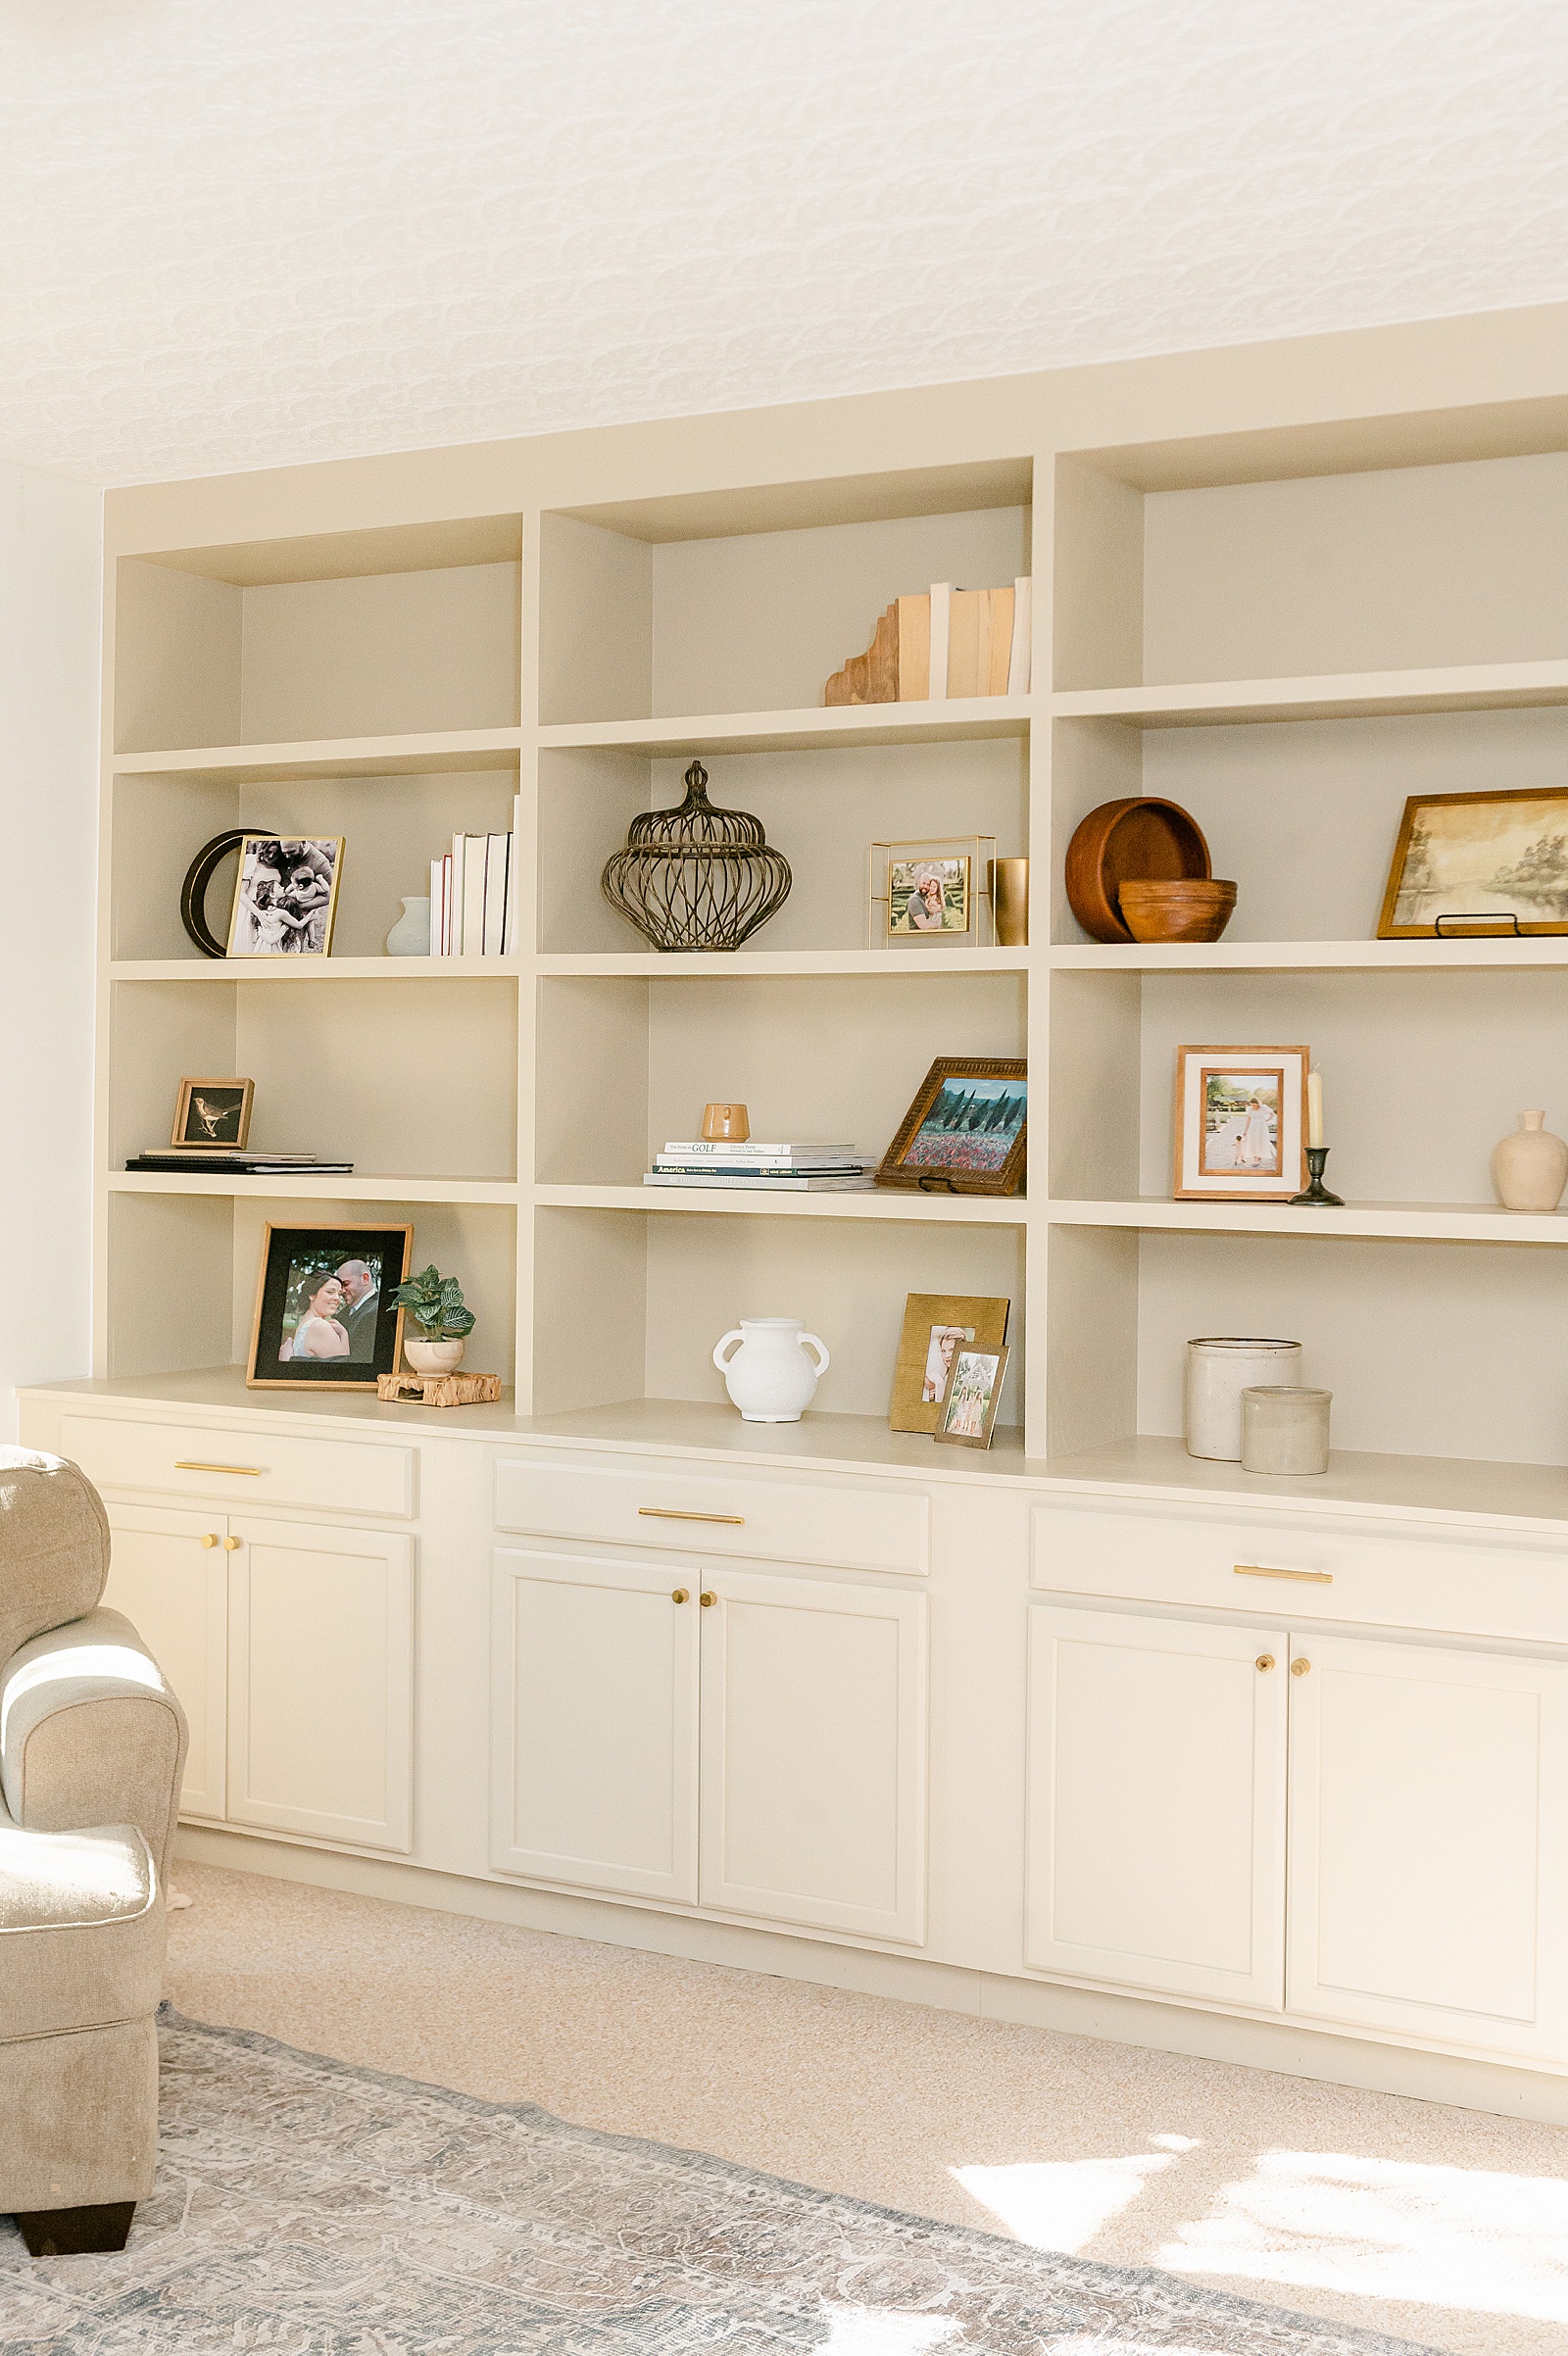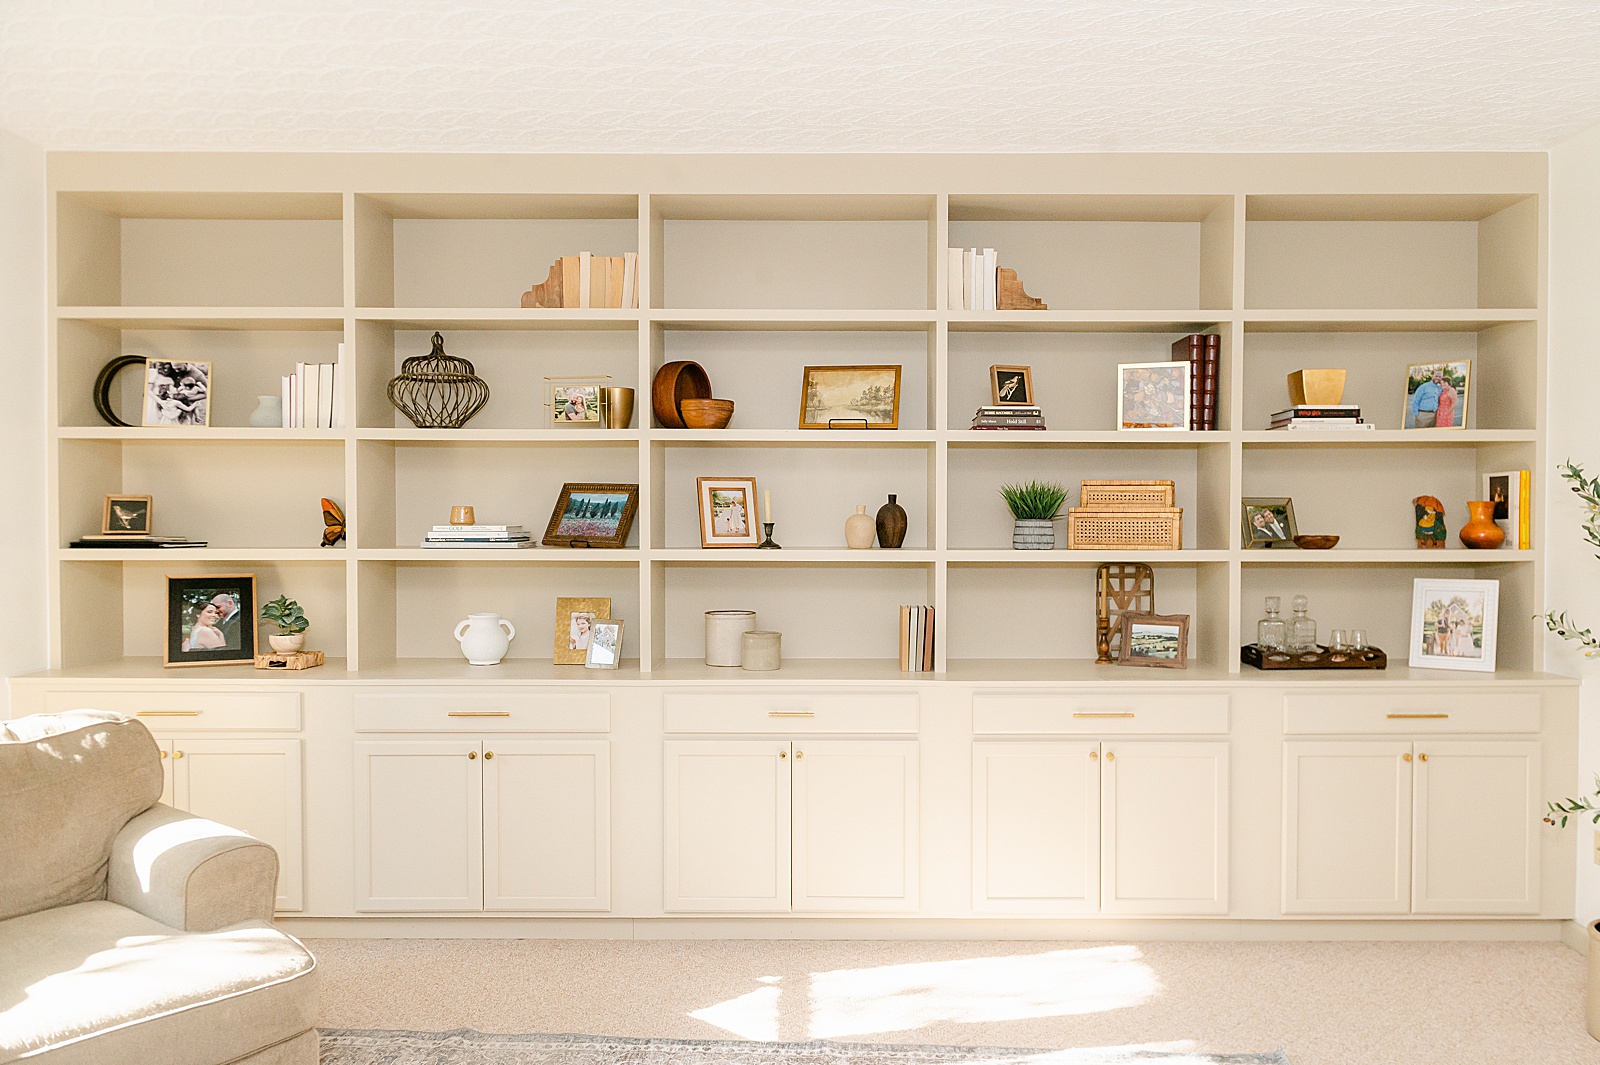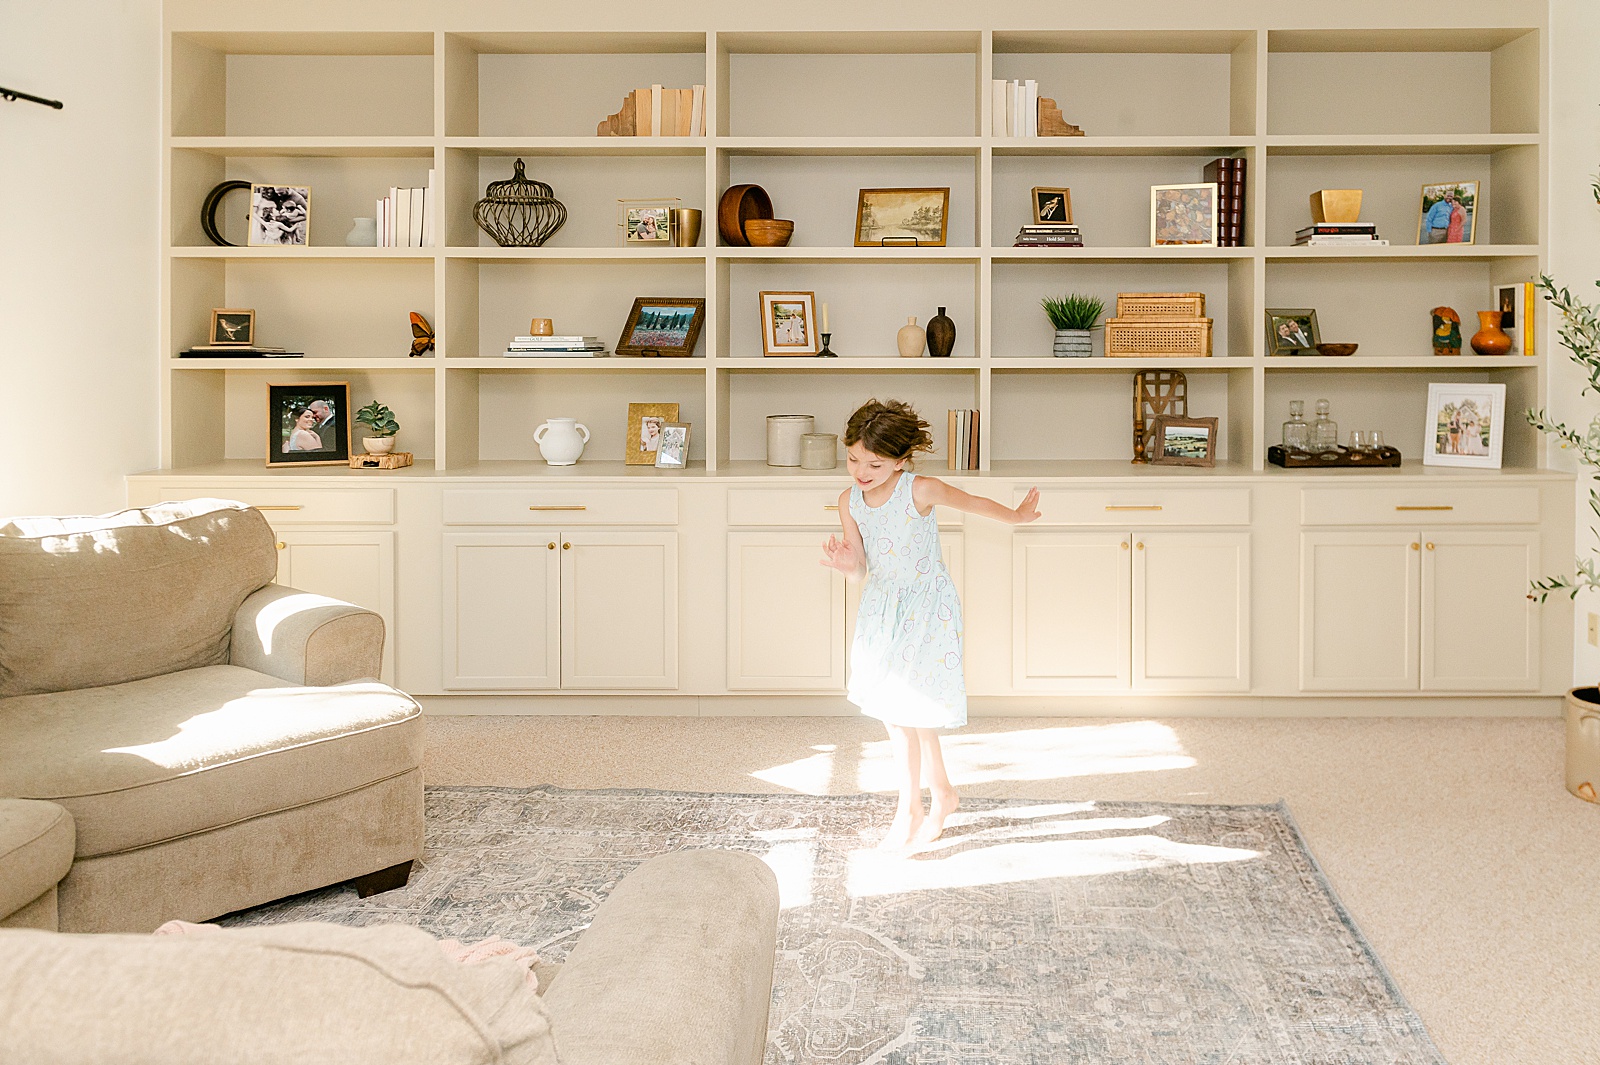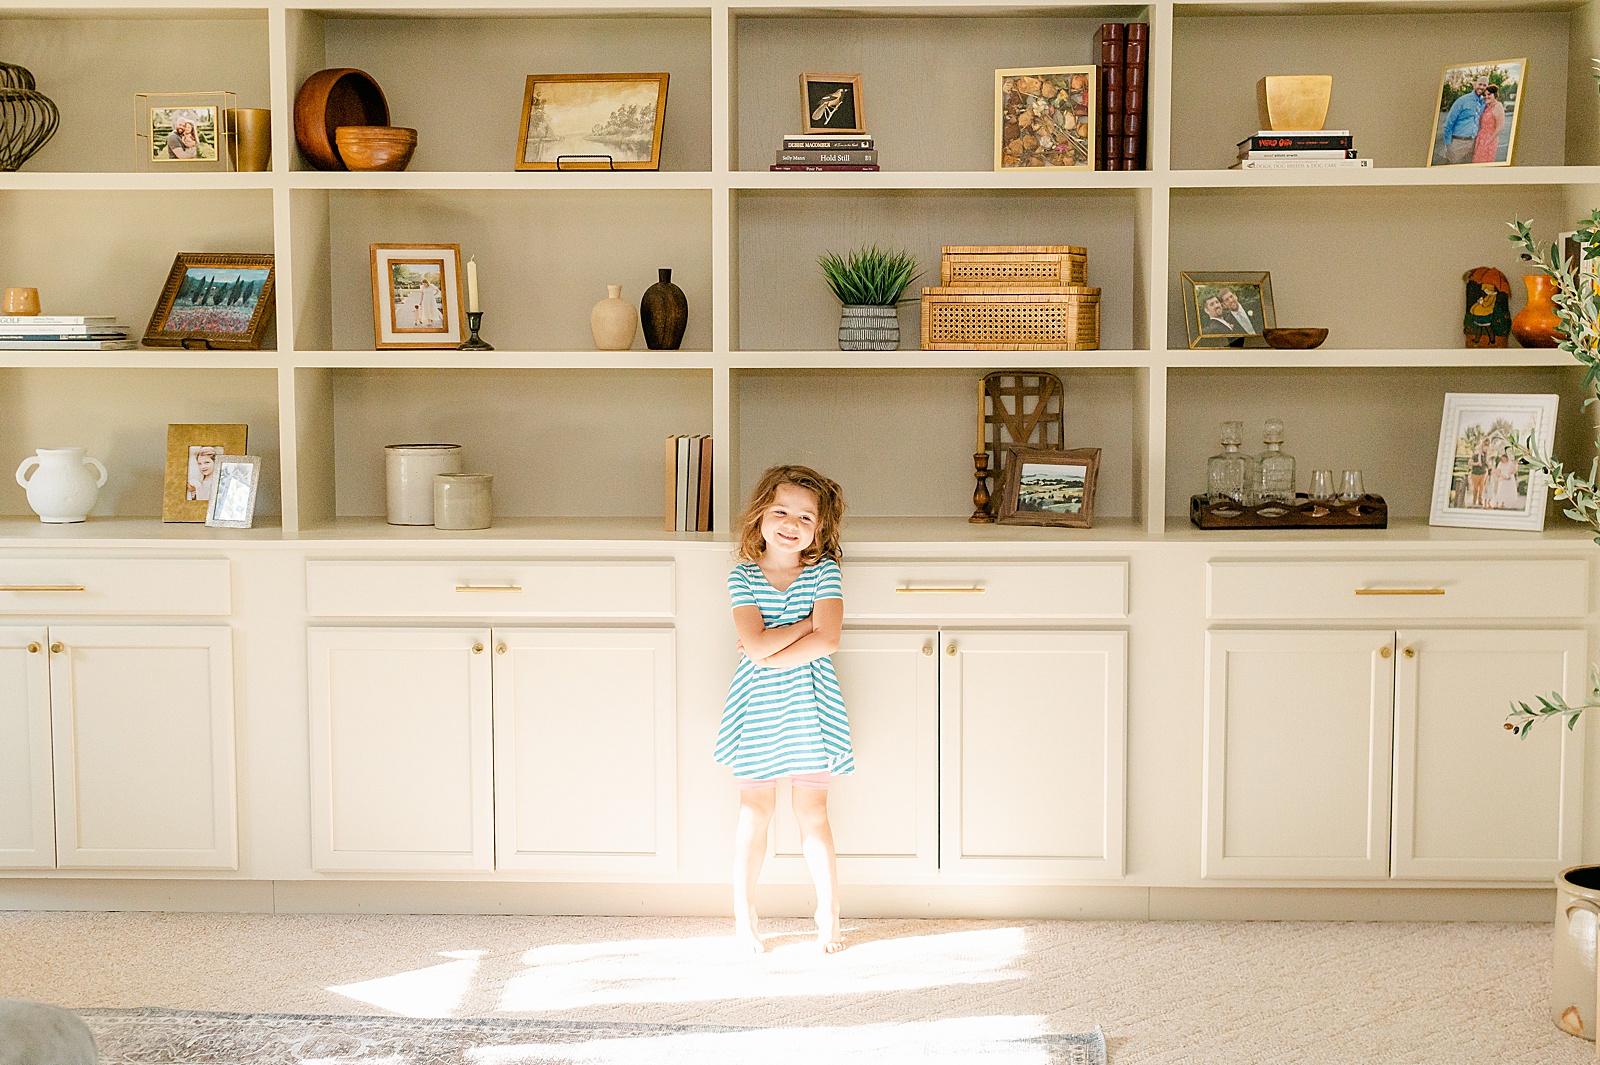
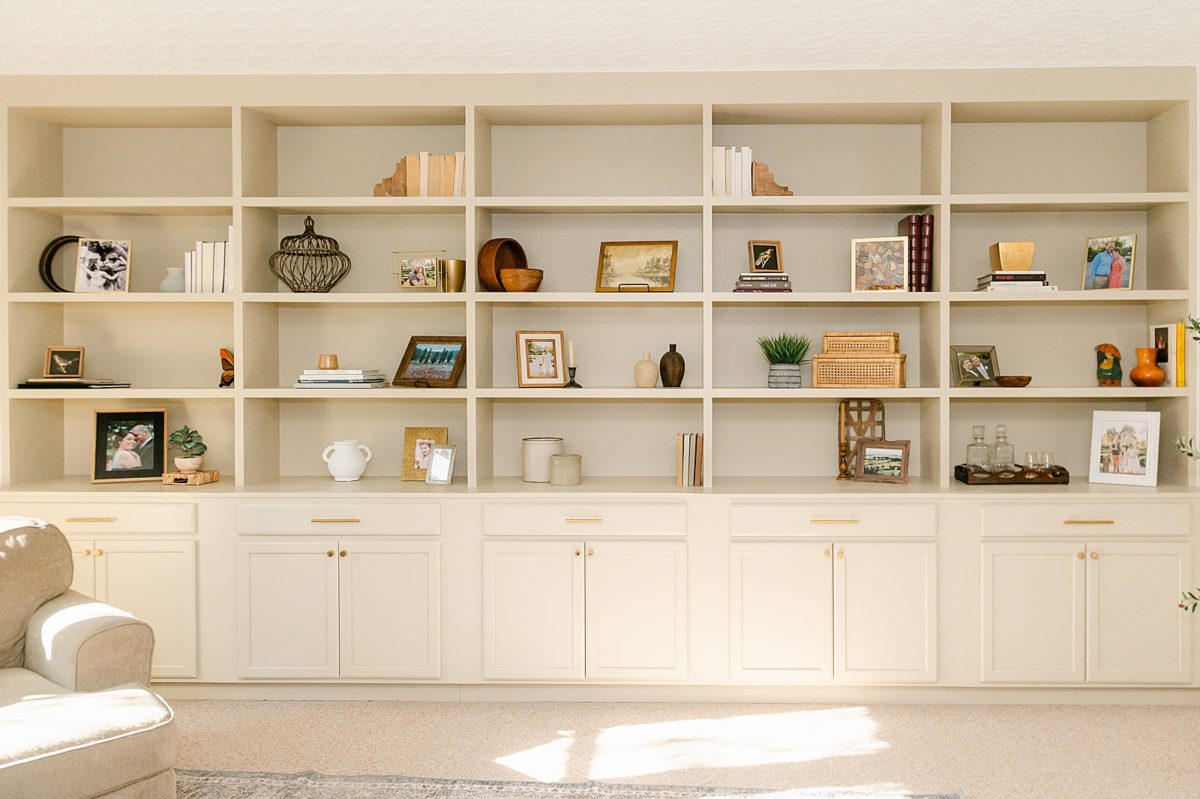
I am officially Blogging something other than a child’s milestone update or family photos again! Lol. I have shared bits and pieces of our journey in getting our built ins made and today I finally get to share them with you! I can’t stop staring at them! I knew they would look amazing, but also CRAZY functional! The base cabinets are SO big they hold all our kids toys that are normally on the floor and then some! They are the perfect combo of Form and Function. My favorite.
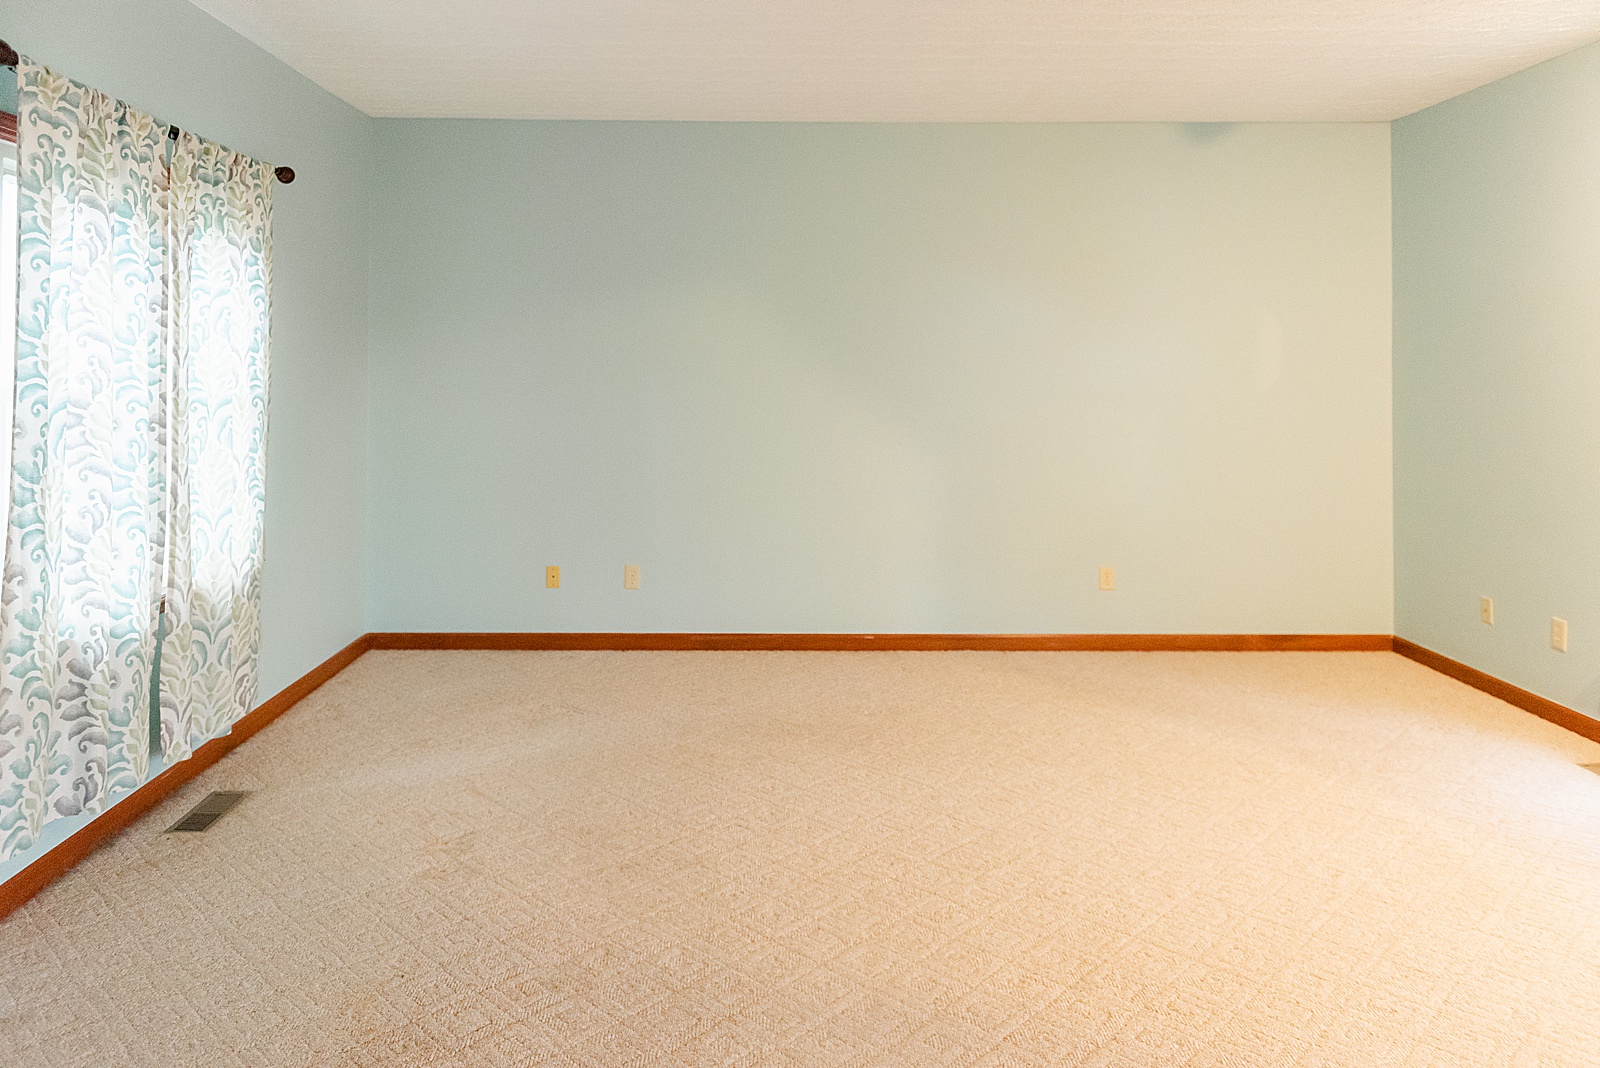
From the MOMENT I saw our living room when we toured the house two and a half years ago I saw that wall and said “Those need shelves.” I may have even said it out loud when we waked through it that day. I knew that big open wall was just perfect for a full wall of built ins. Thankfully Matthew thought it was a great idea as well. We were originally going to buy Ikea shelves and make them semi custom, but the model we wanted was sold out ( and might still be a year later). I had checked for months and they never came available so we decided to just take the plunge and build them ourselves. I did a lot of prepping, planning and Pinterest-ing to come up with what we wanted. I honestly can’t believe these shelves look EXACTLY how I dreamt up.
We knew we wanted to keep it relatively simple ( or at least for Matthew. lol) so we decided to just purchase pre-made unfinished base cabinets from Lowes. We knew we were going to be painting the whole shelf anyway so we thought this was a great way to save time and stress! Matthew custom fit them to our walls with some spacers and we added a slightly longer top to create a little bit of a ledge. The we added the shelves on top. So much math was involved I am thankful for an engineer for a husband. He definitely did ALL the hard work! I just helped occasionally.
After a LOT of wood filling, caulking, sanding the shelves sat in our living room for almost 5 months. Life happened. I used that time to pick paint and hardware, and let me tell you, picking paint is NOT easy for me! After months ( literally) and driving my husband crazy with 4 paints that all looked almost identical, we landed on Sherman Williams Malabar. A pretty Beige-y color. Our windows face east and west on either side of the shelves so we get all the sun and shade light, so it was hard to find a beige that didn’t pull TOO yellow or TOO blue when in all the different lights. We also ordered a spray gun and we both used it for the first time! By the last coat I thought I was a professional! Definitely a learning curve, but SO.MUCH. FASTER. I am pretty happy with the final look!
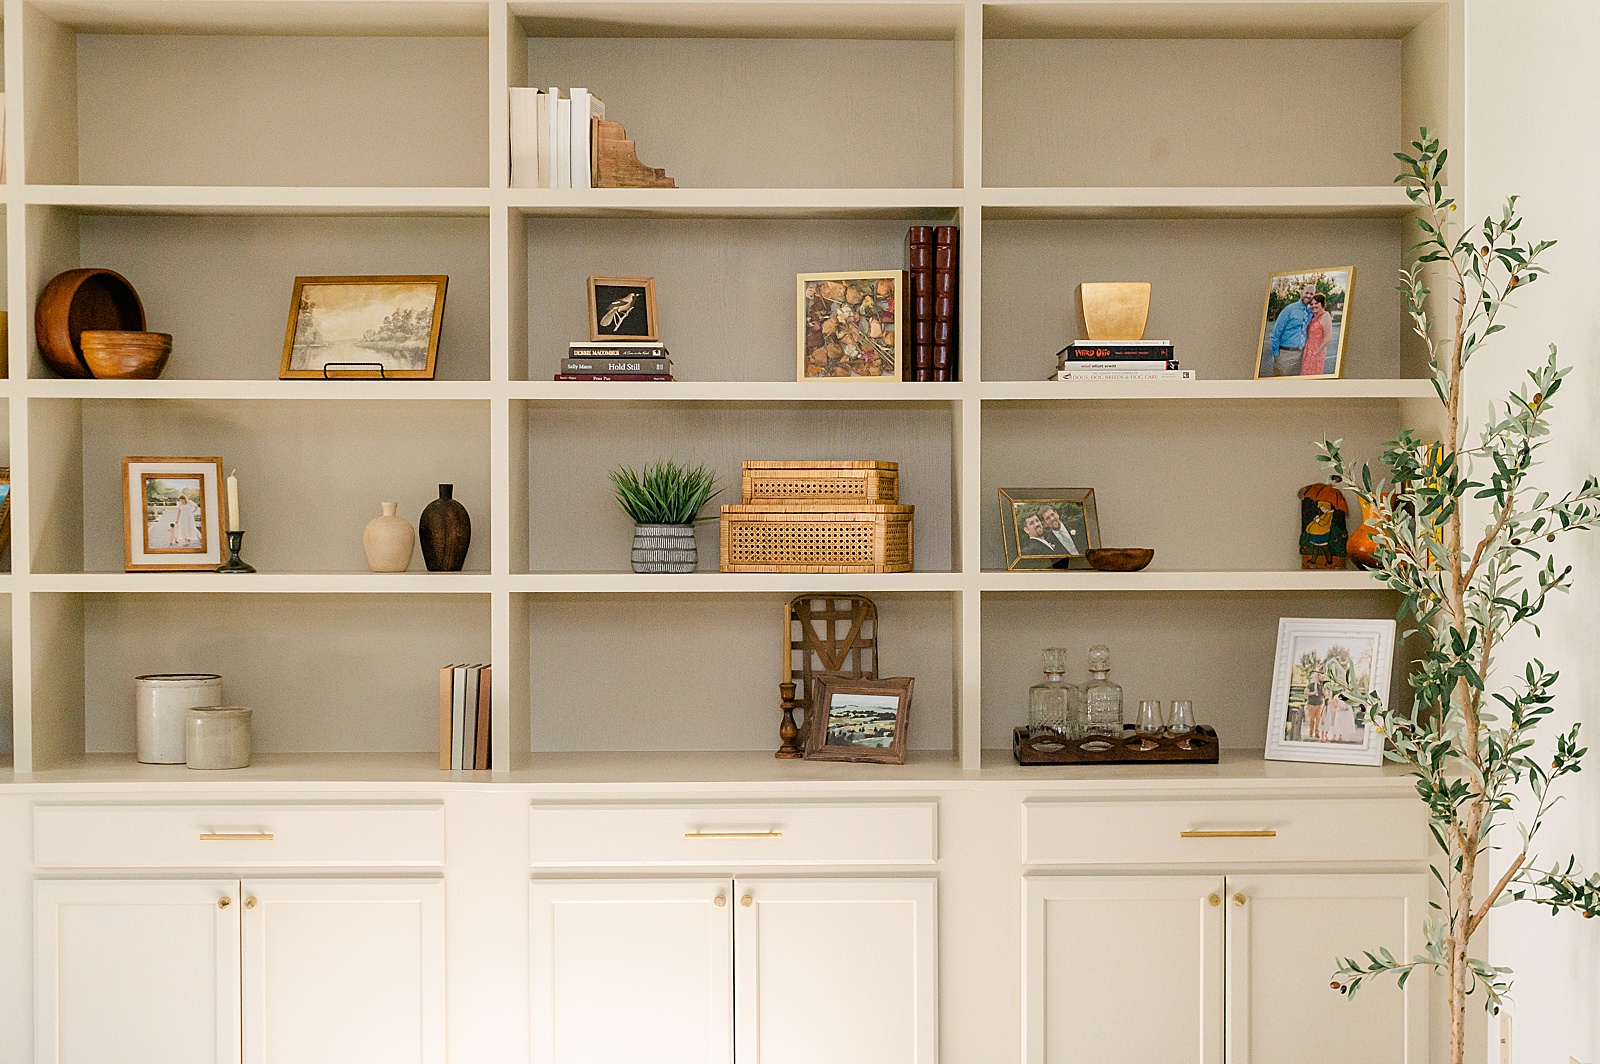
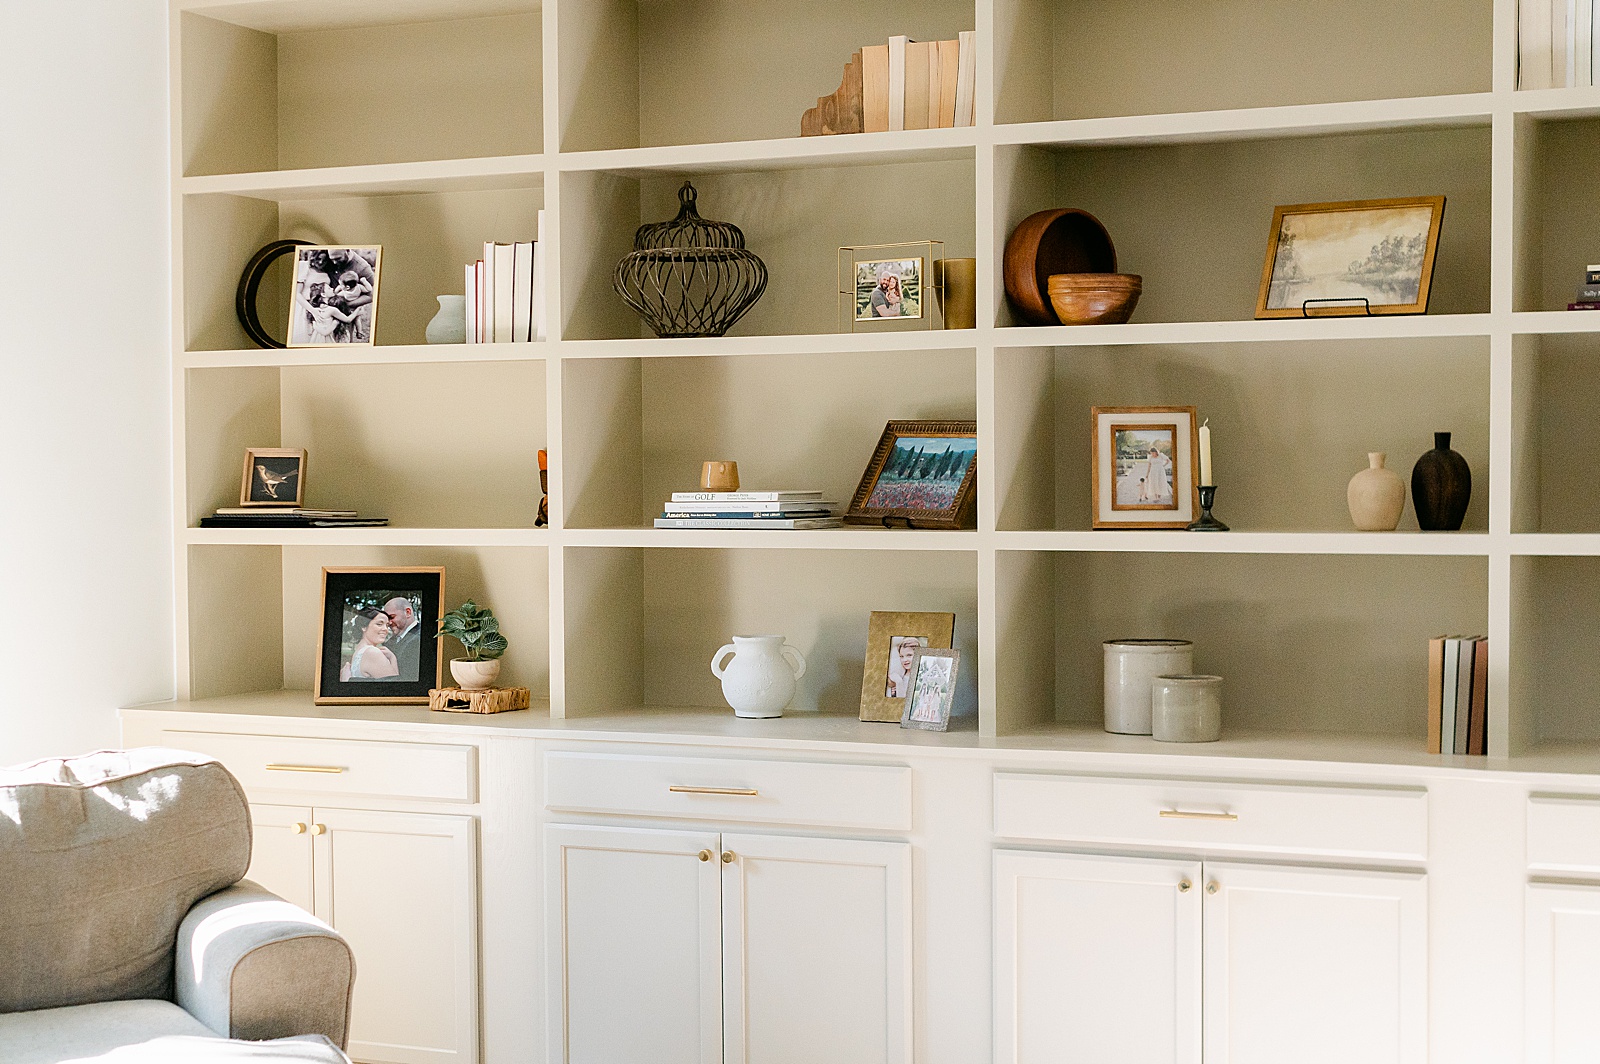
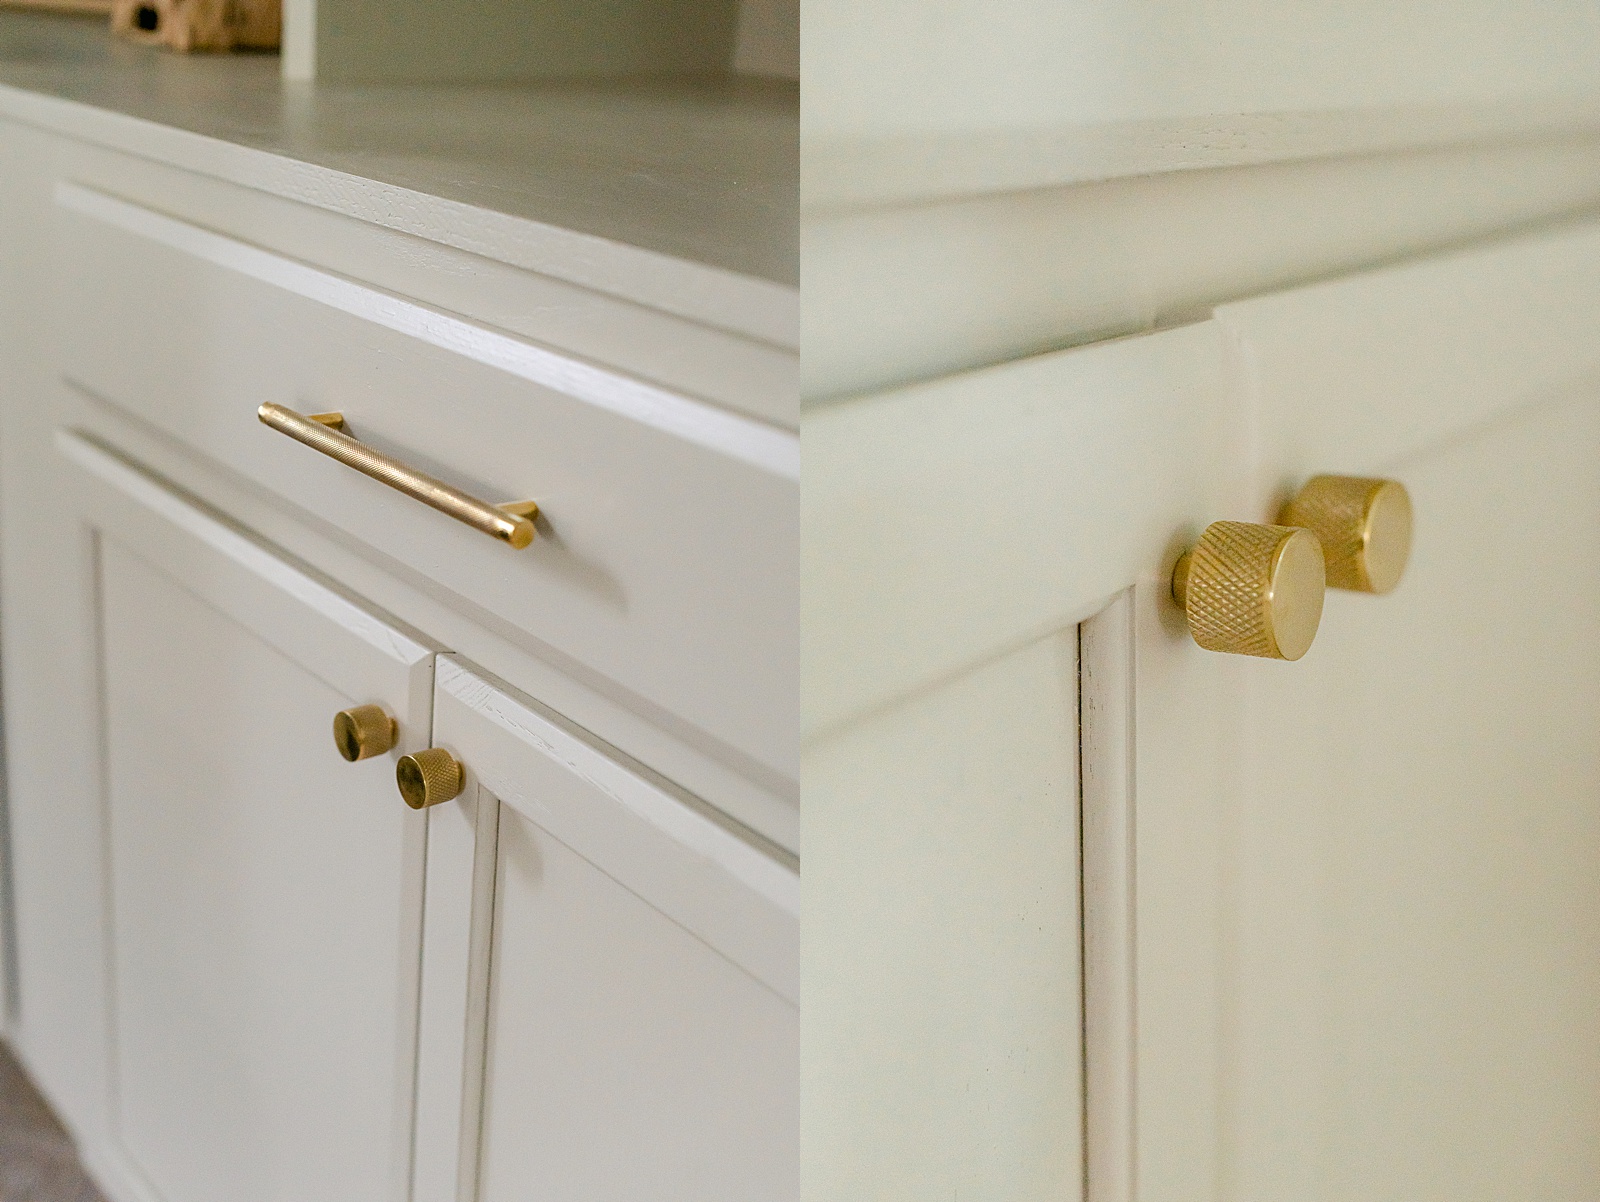
I purchased our hardware from CB2 when they were having a hardware sale. They were actually the first knobs and pulls that I saw and wanted and I went with my instinct! I love them so much! Funny story, they accidentally sent us one smaller than the rest and just so happened to be the first one opened and Matthew drilled holes for it before realizing all the other pulls were bigger. If you look closely in the photos you can maybe tell! But CB2 sent us a new one and it’s on it’s way! The filling, sanding and repainting wont be as fun, but if thats the worst hiccup we came across on this project I am fine with that!
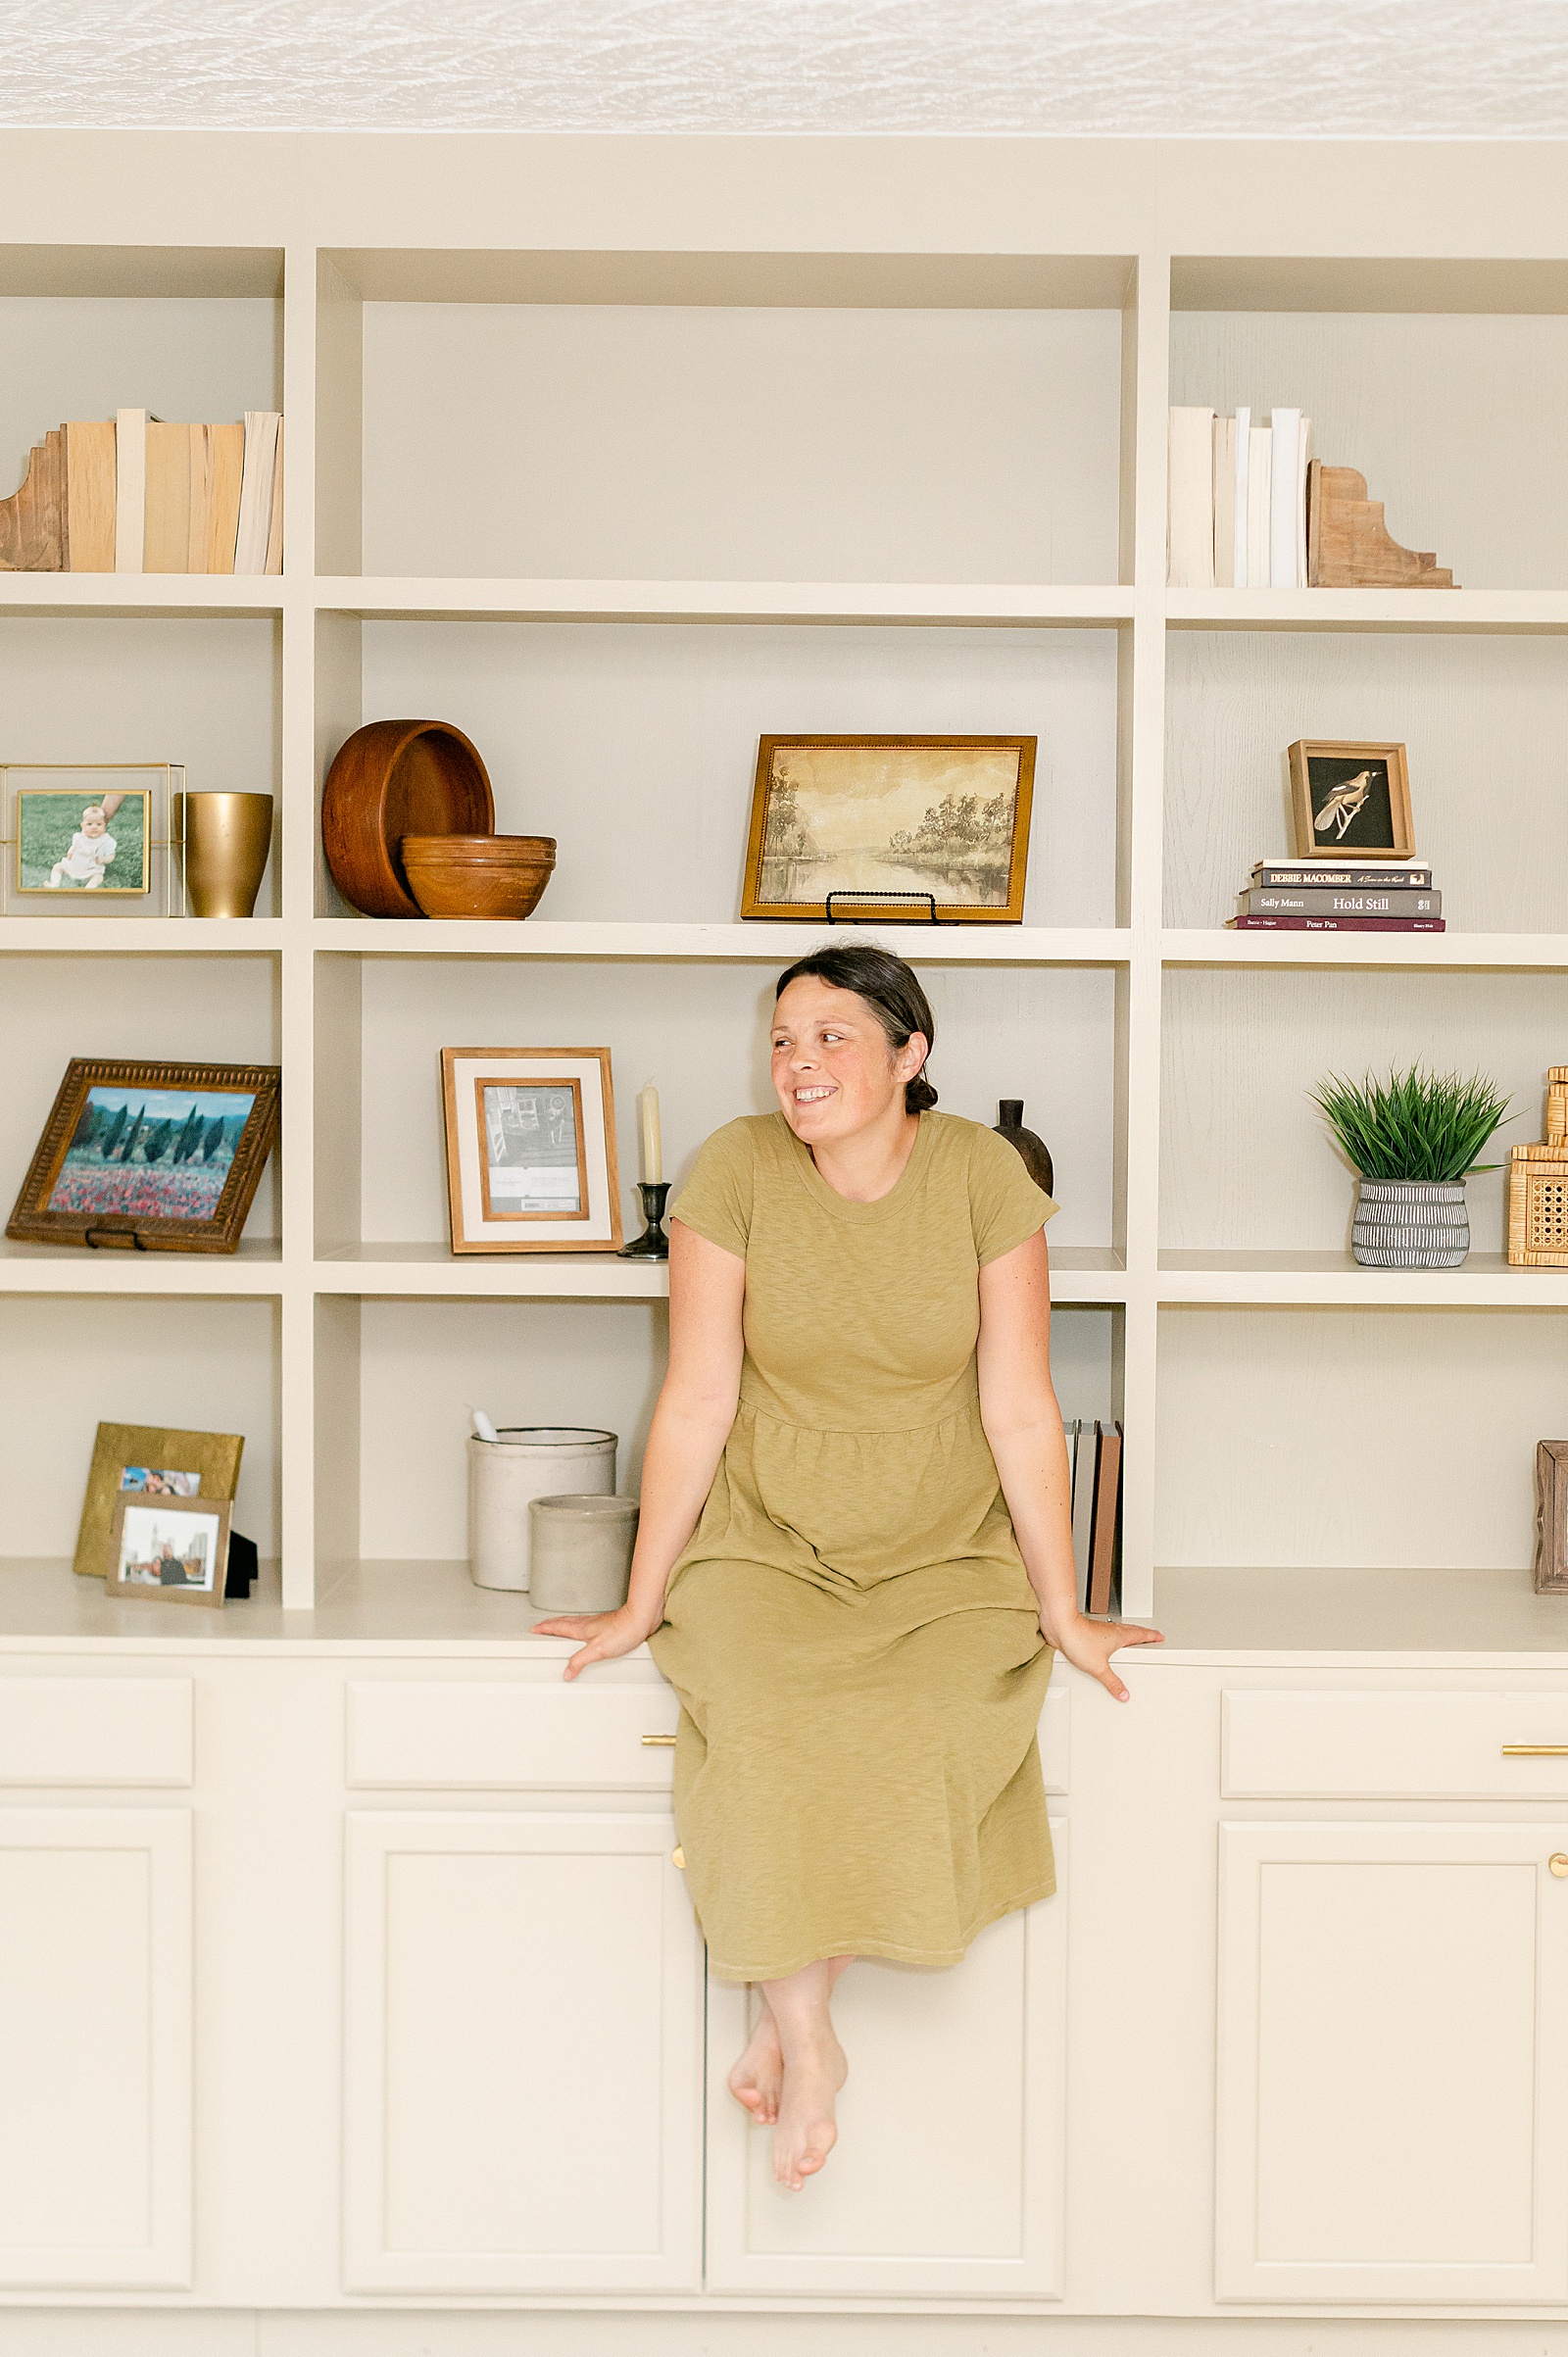
Styling this beast will be an ever changing project that I am excited to take on! There are 20 (!) massive shelves on this beauty and I don’t even have enough “stuff” to get up there! But I am excited for all the finds that will make their way up there! Not to mention all the Holiday decorating!
This was a great first “big” project for Matthew and I and I think we both really enjoyed it together. It sparked a BUNCH of ideas for both of us and it’s one of the first big things in our home that has made it feel like our place. A step closer to the home we want to create! I am enjoying this process of slowly making this place into ours. I am also SUPER thankful for a husband who puts so much work into creating something that I just dreamt up and did his hardest to make it come to life. I can’t wait to see what we create next!

Before: